- In Internet Explorer (IE) select File > Print.
- When the print dialog appears, select Primo Pdf. Then click Print.

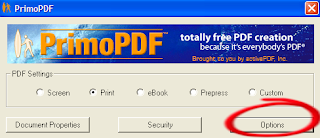
- When the Primo Pdf dialog appears, choose "Print" under "PDF Settings". Then click Ok. Depending on how large your file is, it may take a few minutes for the pdf to be created. When it's finished the pdf file should open up in Adobe Acrobat Reader.

- If you downloaded your blog file as several small chunks (a few months worth at a time) now is the time to put those files together. When you go to print the second chunk in Primo Pdf, this time, click "Options".

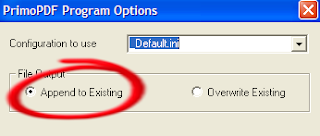
In the Options dialog, make sure "Append to Existing" is selected. Click Ok and return to the previous screen to complete the printing (make sure you are printing to the same file!). This selection will make the second chunk appear in the same pdf file as the first chunk. You can do this with all the remaining prints until you have a complete pdf file.


