- Begin by double clicking on the Blogs2Books icon on your desktop. At any time you can click on a blue "?" next to an item for an explanation of that item.
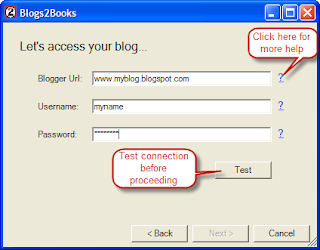
- On the second screen, enter your blog address (must be a Blogger account), username and password. Click "Test". If successful, click "Next". If the test fails, double check your entries and try again.
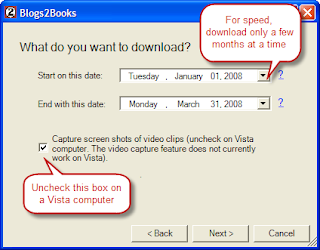
- On the third screen, choose the dates you want to download. All blog entries and pictures between these dates are downloaded. To make the program run faster (especially in the editing phase), I recommend downloading only 3-4 months or about 20-30 short posts at a time. Otherwise the editor (see step 6) may be painfully slow.
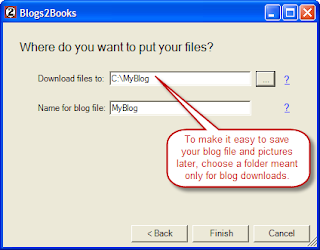
If you are running on Windows Vista, you should uncheck the "Capture screen shots" box, since this will cause the program to freeze on a Vista computer. You will still be able to see and print pictures of your videos while you are connected online. However, you will not have a saved picture of the video. - On the fourth screen, choose the location for your download and the name for the html file that Blogs2Books will create. All the pictures and text will be downloaded to this location so it is often best to choose a folder that is just for your blog downloads.
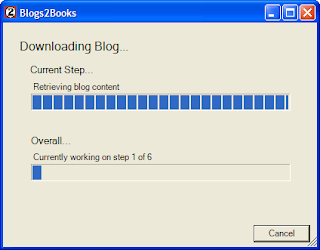
- Click "Finish". The program will download the following from your blog to your computer:
- Entries (or posts)
- Comments
- Pictures
- A Snapshot of each video (if that option was selected)
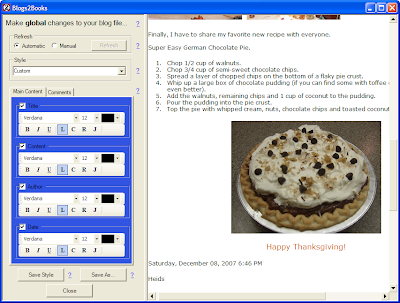
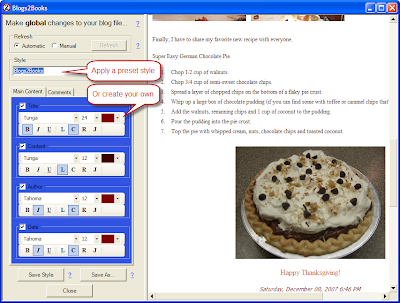
- When the download finishes, the editor will open. The editor allows you to change the look of your newly created blog file. The editor works by applying styles to your file. You can change fonts, sizes, colors and alignments for several key pieces such as the title, date, author and blog entry. The editor does not allow you to fix typos, add pictures or other detailed work. To do that you will need to hand edit the file after completing the Blogs2Books program (see the topic on using Nvu). Once you have a style set up the way you like it, you can save that style for future use by clicking "Save Style". When you have completed editing your file, click "Save As" or "Close" to save your file and end Blogs2Books.
