What Is Blogs2Books?
Blogs2Books is a FREE program for backing up your blog and preparing it for print. Read the Blogs2Books story or Step-by-Step instructions.
January 21, 2009
Temporarily Down
Due to changes on Google's end, Blogs2Books currently does not download comments correctly. Due to my extremely busy schedule, this fix and other technical support will not be available until sometime this summer. Thanks for your interest in Blogs2Books. Please check back!
July 9, 2008
Version 2.0
Version 2.0 of Blogs2Books is now available! Plus view all the step-by-step instructions (posted below) for getting your book printed!
This version addresses the following things:
This version addresses the following things:
- Now works on Windows Vista
- Comments can be downloaded (broken in previous version due to a change by Google)
- Downloads highest quality pictures for better printing
- Uses relative path references in html file so your download folder can now be moved anywhere and the pictures will still show up correctly.
Example Book
Step 1: Using Blogs2Books
- Begin by double clicking on the Blogs2Books icon on your desktop. At any time you can click on a blue "?" next to an item for an explanation of that item.
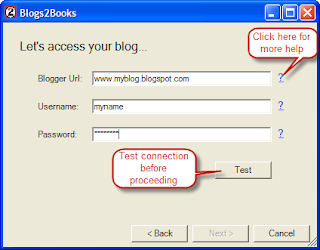
- On the second screen, enter your blog address (must be a Blogger account), username and password. Click "Test". If successful, click "Next". If the test fails, double check your entries and try again.
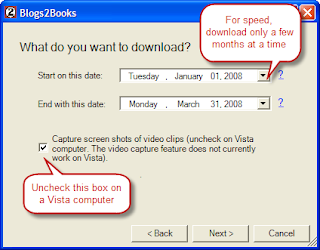
- On the third screen, choose the dates you want to download. All blog entries and pictures between these dates are downloaded. To make the program run faster (especially in the editing phase), I recommend downloading only 3-4 months or about 20-30 short posts at a time. Otherwise the editor (see step 6) may be painfully slow.
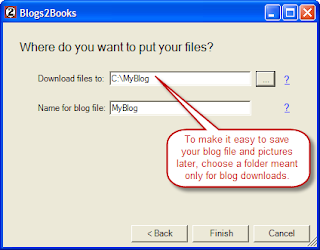
If you are running on Windows Vista, you should uncheck the "Capture screen shots" box, since this will cause the program to freeze on a Vista computer. You will still be able to see and print pictures of your videos while you are connected online. However, you will not have a saved picture of the video. - On the fourth screen, choose the location for your download and the name for the html file that Blogs2Books will create. All the pictures and text will be downloaded to this location so it is often best to choose a folder that is just for your blog downloads.
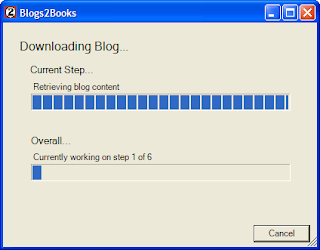
- Click "Finish". The program will download the following from your blog to your computer:
- Entries (or posts)
- Comments
- Pictures
- A Snapshot of each video (if that option was selected)
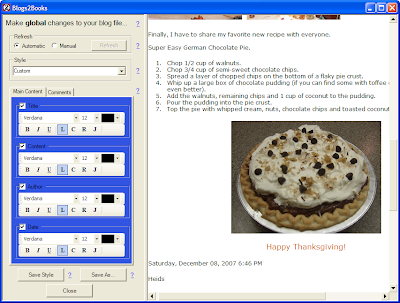
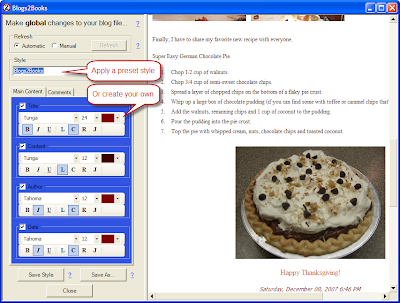
- When the download finishes, the editor will open. The editor allows you to change the look of your newly created blog file. The editor works by applying styles to your file. You can change fonts, sizes, colors and alignments for several key pieces such as the title, date, author and blog entry. The editor does not allow you to fix typos, add pictures or other detailed work. To do that you will need to hand edit the file after completing the Blogs2Books program (see the topic on using Nvu). Once you have a style set up the way you like it, you can save that style for future use by clicking "Save Style". When you have completed editing your file, click "Save As" or "Close" to save your file and end Blogs2Books.
Step 2: Editing the File Using Nvu
When Blogs2Books is finished you will have an html file that is ready to be converted into a pdf file for printing. However, you may want to tweak the file a bit first. If you are fairly handy with html you may be comfortable editing the file in html directly. For most people, an html editor is much easier. I recommend using Nvu because you can download it for free and it is pretty easy to use.
Some things you may want to edit in your html file:
Some things you may want to edit in your html file:
- typos
- adding/removing entries
- adding/removing pictures
- adding/removing comments
- changing colors or fonts on specific words or sections
- adjusting how pictures and paragraphs line upFor most users, you can adjust picture placement just by hitting the "Enter" key to add extra space. For html users, you can use the html code <div style="clear:both"></div> at any point to force all other pictures and words to clear out to the line below.
Step 3: Setup Internet Explorer
In order to create a pdf file using Primo Pdf (covered in the next step), you will need to print your html file from another program. Unfortunately, Nvu does not print correctly to Primo Pdf. For this step I recommend using Internet Explorer. You can also use Firefox if you prefer. The explanation given here is for Internet Explorer (IE).
- Open IE.
- From the menu bar choose File > Open.
- Click "Browse" and locate the html file you want to print. Click "Ok" to open the file.
- From the menu bar choose File > Page Setup.
- The paper size should be "Letter" and the source "Paper Feed Switch". The orientation should be "Portrait".
- Delete what is in the "Header" and "Footer" boxes. If you want to put a page number on your page you can type "&b&p" into either box. To center the page number use "&b&b&p".
- Change the margins to your preference. I found 0.8 on the sides and 0.75 on the top and bottom worked well. (Note: If you downloaded Blogs2Books prior to July 9, 2008 you will probably also need to change the width inside your html file. Open the html file and near the top of the file replace the "675px" with "650px".)
- Click "Ok."

Step 4: Insert Page Breaks
At this point your html file should look just the way you want it and you should have set up Internet Explorer (IE) for printing. Next you need to preview your file and insert printing page breaks wherever needed. This will require you to delve into the raw html file, but hopefully this will not be too complicated.
- With your html file open in IE, go to File > Print Preview. This is how your file will look when printed. Hopefully no words or pictures are being cut off on the sides. If they are, you will need to adjust your margins or move your pictures.
- Look at your file and determine the first place you think a page break should occur. This is usually where a picture is being cut in half across two pages or where a title is printed at the bottom of one page while the rest of the entry is on the next page.
- In Nvu, locate the spot where you want to insert the page break and place your cursor at that spot.
- Now for the html part. Click on the "Source" tab at the bottom of the Nvu screen. This will switch to the html code and your cursor will be in the same spot it was in before. In other words, this is exactly the spot you want to insert the page break.

- At this location paste this html code:
<p style="page-break-before: always"></p> - Save the file (File > Save). When you return to the "Normal" tab, the page won't look any different. The only way to see if it worked is to check the print preview.
- Return to IE. Close the previous print preview (if still open). Refresh the page. Open the print preview again to see the effect of your change.
- Repeat these steps until the preview looks just right. Note: This process can be very slow if your file has a lot of pictures since IE can take a while to load pictures. This is one of the main reasons why it helps to download only a few months of blog entries in each file instead of a whole year or more.
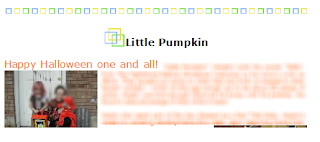 In this example, two pictures are being cut off at the bottom of the page. I'd like to push the entire entry onto the next page.
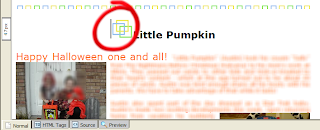 On my page, I want the page break right before the title, so I put my cursor there.
Step 5: Create Pdf
- In Internet Explorer (IE) select File > Print.
- When the print dialog appears, select Primo Pdf. Then click Print.

- When the Primo Pdf dialog appears, choose "Print" under "PDF Settings". Then click Ok. Depending on how large your file is, it may take a few minutes for the pdf to be created. When it's finished the pdf file should open up in Adobe Acrobat Reader.

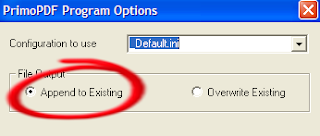
- If you downloaded your blog file as several small chunks (a few months worth at a time) now is the time to put those files together. When you go to print the second chunk in Primo Pdf, this time, click "Options".
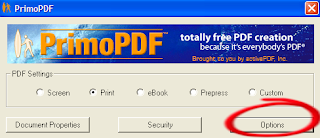
In the Options dialog, make sure "Append to Existing" is selected. Click Ok and return to the previous screen to complete the printing (make sure you are printing to the same file!). This selection will make the second chunk appear in the same pdf file as the first chunk. You can do this with all the remaining prints until you have a complete pdf file.
Subscribe to:
Comments (Atom)


